Introduction Integrating security into a widely used platform like GitHub is both a challenge and an opportunity to enhance its...
19 April 2022
Lire cet article en Français
“Easy Authentication” in Azure

User authentication is a must if you want to protect who can use your applications.
For some time now, you have been able to set up authentication for applications directly from the Azure portal using Microsoft, Facebook, Twitter, Google, OpenID Connect-compatible, and other identity providers. This list will soon include Apple as well.
Unfortunately, the documentation is difficult to find and is somewhat incomplete.
Today, we’ll show you how to incorporate Azure Active Directory (AD) authentication into a front-end application.
Configuring Application Service Authentication
You will need an Azure subscription to implement Azure AD authentication.
To begin, you must create your app service to host your application.
Here is the information we will use in our example:
- App service name: gmo-web-ui
- Resource group name: rg-app-services

Once you have created your app service, create an app registration in your Azure AD.
We will use the following information for our case study:
- Display name: gmo-web-ui
- Supported account types: Single tenant

Keep the Client ID (2) and the secret (1) that you created for this app service safe.
Define a Redirect Uniform Resource Identifier (URI) (3) for your application: in our example, we will use https://gmo-web-ui.azurewebsites.net/.auth/login/gmooidc/callback
Click Authentication in the app service, then Add an identity provider:

We used the following data for our example:
- Identity provider: OpenID Connect
- OpenID provider name: gmooidc
- Metadata entry: Document URL
- Metadata URL: https://login.microsoftonline.com/{TenantID}/v2.0/.well-known/openid-configuration
Have a look at the Microsoft documentation describing the various possible values.

If you try to access your application now, you will be prompted to authenticate yourself.
Using an API for Authentication
In reality, you will almost certainly be required to authenticate yourself via an Application Programming Interface (API). To do this, you must first create an app registration for this API in your Azure AD.
Let’s use the following information for our case study:
- Display name: gmo-web-api
- Supported account types: Single tenant

Next, add an API permission called user_impersonation. This will allow the application to access the connected user’s identity and use that identity for API calls.

Select the app registration for your UI:
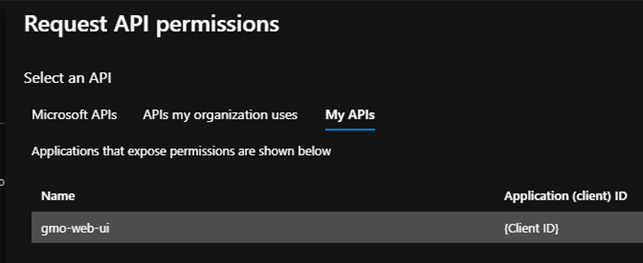
Select user_impersonation:

Finally, specify the scope of this API: this allows authorization of the front-end application with the API.


All that remains after creating and configuring your resources is to define the scope and information required for your application.
You need to open an Azure Cloud Shell or PowerShell console with the Azure Command-Line Interface (CLI) installed and run the following command:
az webapp auth openid-connect update --name gmo-web-ui --provider-name gmooidc --resource-group rg-app-services –scopes "offline_access,openid,email,api://{API_ClientId}/user_impersonation"
With these scopes, you can:
- offline_access: refresh the user’s token when it has expired
- openid: identify the user
- email: recover the user’s email address
- api://{API_ClientId}/user_impersonation: log in through the API with the user’s ID
Code-Side Authentication
For authentication with your API, include your authentication token in your requests via the Authorization header.
Example:
Authorization: bearer eyqsd53qsd4[…] »
Simply perform a GET on the “/.auth/me” route to obtain the authentication token.
You will receive the following response:
The token is equivalent to the “access_token” property. However, it has a limited lifespan. That is why we recommend adding a handler to manage token expiry cases. In this scenario, the API will return an error 401.
Perform a GET on the “/.auth/refresh” route to refresh the token and recover it again via “/.auth/me” GET.
Here is the code for a simple Reactjs application that does this:
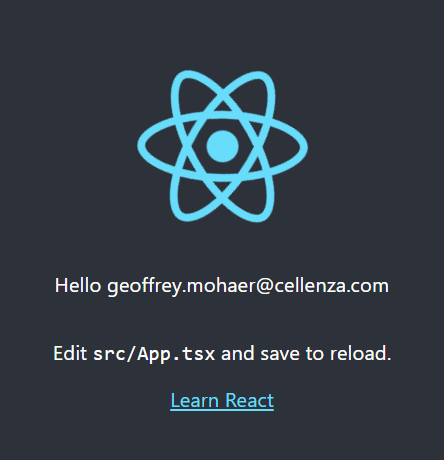
https://github.com/Mohye77/AppServiceEasyAuthReact
Did you find this tutorial helpful? Do you want to learn more about Azure authentication? Leave a comment below or get in touch with our experts!