Developed by GitHub and OpenAI, professionals are calling GitHub Copilot a “revolutionary tool for developers,” since it combines Artificial Intelligence...
11 January 2022
Lire cet article en Français
What is Azure IoT Hub?
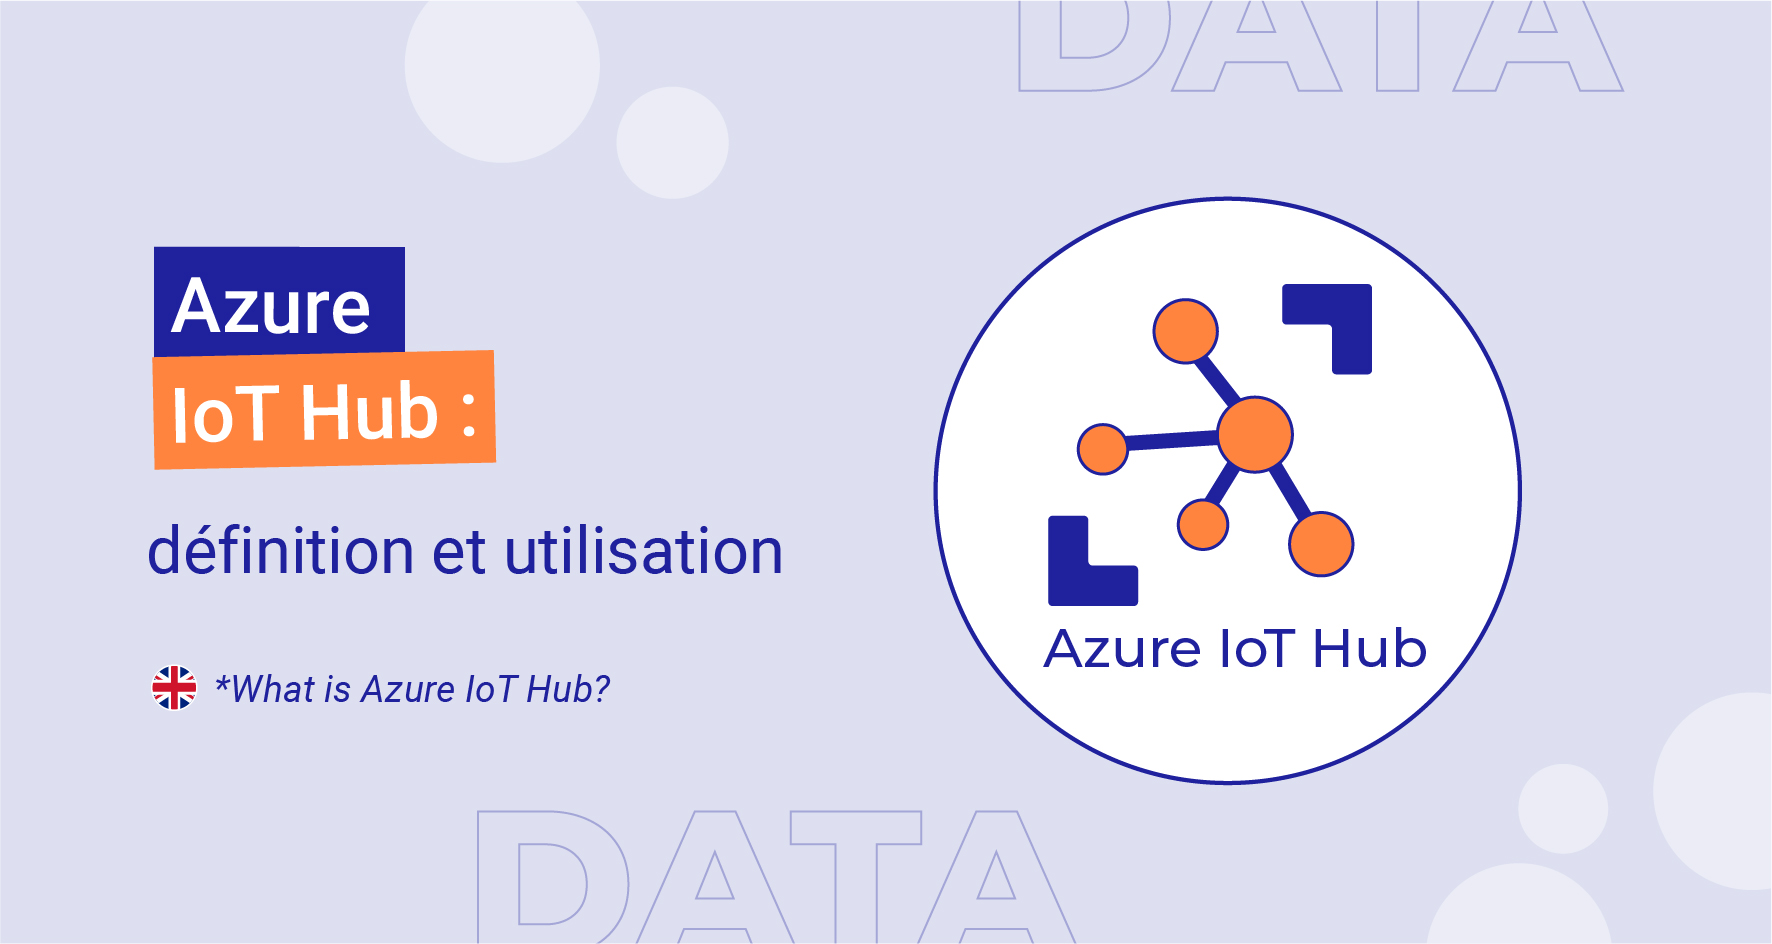
IoT Hub is Microsoft’s Internet of Things (IoT) platform as a service (PaaS) solution that acts as a gateway between connected objects and the cloud platform.

What is the Purpose of IoT Hub?
IoT Hub has many uses. Read on to find out more.
The Role of IoT Hub in Communication
IoT Hub enables two-way communication between the cloud and connected objects. It supports the Advanced Message Queuing Protocol (AMQP), Message Queuing Telemetry Transport (MQTT)(over Transmission Control Protocol (TCP)), and Hypertext Transfer Protocol Secure (HTTPS) communication protocols.
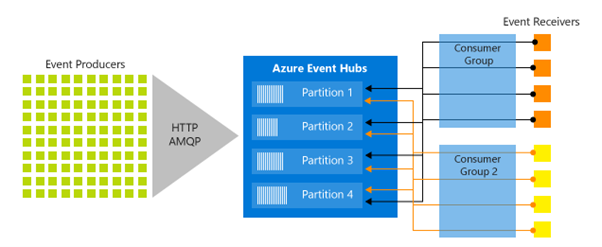
Communication is done through a “messaging/Event,” managed by an “Event hub” wrapper in IoT Hub.
IoT Hub and Device Identity Registry
IoT Hub keeps an identity register of all devices connected to the platform. It stores information about the devices, their authentication details, and access rights. A device must be declared in the IoT Hub to connect to it.
IoT Hub and Authentication
Azure IoT Hub grants endpoint access by verifying a token against shared access policies and identity register security references. You can use any X.509 certificate to authenticate a device with IoT Hub. Supported certificates include:
- an existing X.509 certificate
- an X.509 certificate signed by a certificate authority
- a self-generated and self-signed X.509 certificate
IoT Hub Device Twins Feature
This feature lets you store the state and configuration of all devices connected to the platform in the cloud. IoT Hub does this by generating and maintaining JSON files for every device on the platform containing information about the device state and its configurations. These files are synchronized with the devices periodically. This detects their state without having to communicate with them individually. Their configuration can also be updated simply by changing this file, which is then synchronized with the device.
IoT Hub Device Provisioning Service
The IoT Hub Device Provisioning Service is a helper service for IoT Hub. It enables zero-touch provisioning without human intervention, allowing customers to provision millions of devices in a secure and scalable manner.
IoT Hub Demonstration
The best way to teach you how to use this tool is through demonstration.
In this post, I will show you how to create an IoT Hub and add a device (Microsoft device simulator) that will send telemetry (temperature + humidity) to be displayed in Power BI.
Requirements:
You will need the following for this demo:
- an Azure account
- a Power BI account (we’ll look at how to create one later on)
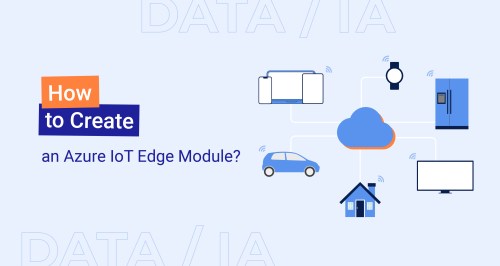
Step 1: Create the IoT Hub
We start by creating our IoT Hub.
- In the Azure portal, go to “Create a resource,” then the “Internet of Things” category. You will see IoT Hub.

- Complete the “name” and “region” fields.

- On this screen, select the “Public endpoint” option, then press Next.

- Tier choice:
IoT Hub offers two tiers: Standard and Basic. The main difference between them is the type of communication. The IoT Hub standard tier enables two-way communication between devices and the cloud, while the Basic tier only allows for one-way communication (device to cloud).
The Standard tier has more features, such as IoT Edge, device twins, etc. (see the Microsoft documentation on choosing the right tier for your solution for more information).
For this demo, choose the F1 tier (Free tier). This is equivalent to the Standard tier with limited daily messaging capacity.
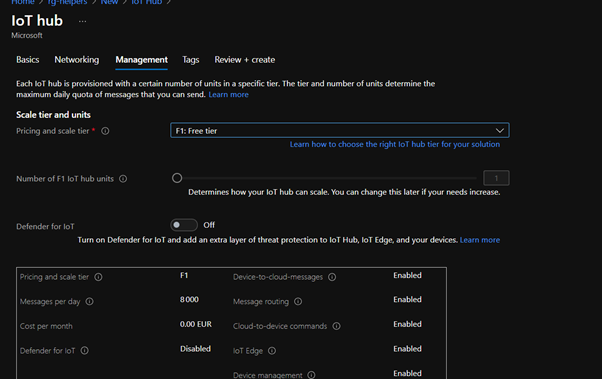
Continue to the end without changing anything and click Create.
Step 2: Create a Device
- Once you have created your IoT Hub, go to “IoT devices” in the “Explorers” section.

Click “New” and give your device a name.
- Device Authentication:
IoT Hub provides two authentication methods for communication between the device and the hub. You can use Shared Access Signature (SAS) token-based authentication or X.509 certificate-based authentication.
The SAS token-based method authenticates each call made by the device to the IoT hub by associating the symmetric key with each call. X.509-based authentication allows authentication of an IoT device at the physical layer while establishing the connection using the Transport Layer Security (TLS) standard connection.
We will use an SAS key for this demo. Complete the information as shown below:

Once you have created your device, click on it to get the connection string and make a note of it.
Step 3: Send the Telemetry to the IoT Hub
Now let’s send our telemetry to the IoT Hub. We will use a simulator for this, made up of a Raspberry Pi 3 board and an AdaFruit BME280 temperature/humidity sensor.

Take the connection string you noted down earlier
and paste it into the “connectionString” field.
Press “Run.”
Every time the LED flashes, the simulator sends the temperature and humidity measurements to the IoT Hub.
You can see the sent messages in the console under Run.

If you go back to the “Overview” tab for your IoT Hub, you will notice that the number of messages used has changed on the graph.

We can use Cloud Shell to see the messages sent to the IoT Hub.

Type the following command:
az iot hub monitor-events --hub-name iothubdemoblog --device-id simulateurdemoiot
Note: Do not stop the simulator. Leave it running in the background and send as many messages as possible. This will be helpful at the end of the demo.

Step 4: Prepare Power BI To Receive Data
Go to the Power BI registration page and use the registration form.
Note: You must have a business account to create a free account (Gmail and Yahoo email addresses will not work).
Once you have registered, log in to Power BI with your credentials. This takes you to your default workspace.
Click “Workspace” then “Create a workspace” (see below) and create a dedicated workspace for our demo.

Step 5: Configure Events
Now we’ve created a new Power BI workspace, let’s set up the remaining elements.
Go back to the Azure portal for the IoT Hub you created. In the side menu of the IoT Hub page, select “Endpoints,” then “Events,” in the “Built-in endpoints” section.
When the form opens, create a new consumer group called “demoblog” in the “Consumer groups” section, as shown below, then click “Save” to save your changes.

As mentioned earlier, IoT Hub is based on an Event Hub. Like in an Event Hub, the Consumer Group allows multiple different consumers to consume the same messages, each with its own offset.
Step 6: Create an Analytics Stream
Azure Stream Analytics is a real-time analytics and complex event processing engine for analyzing and processing large volumes of fast streaming data from various sources at the same time.
Let’s look at how to create a stream analysis job.
Search “Stream Analytics job” in the Azure portal search bar.
Complete the New Stream Analytics job form as shown below:

Click “Create.” It will take a few minutes to create the new Stream Analytics job. Keep an eye on the notifications section for updates.
Once the analytics job has been created, it appears on your dashboard. Select it and go to “Inputs” under “Job topology.”
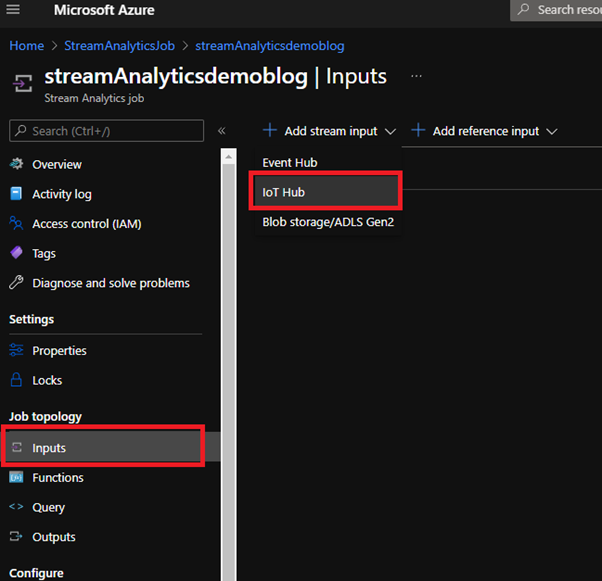
Now we add our data source for the messages received in the IoT Hub.
Click “+Add stream input” and select IoT Hub, as shown in the previous screenshot.
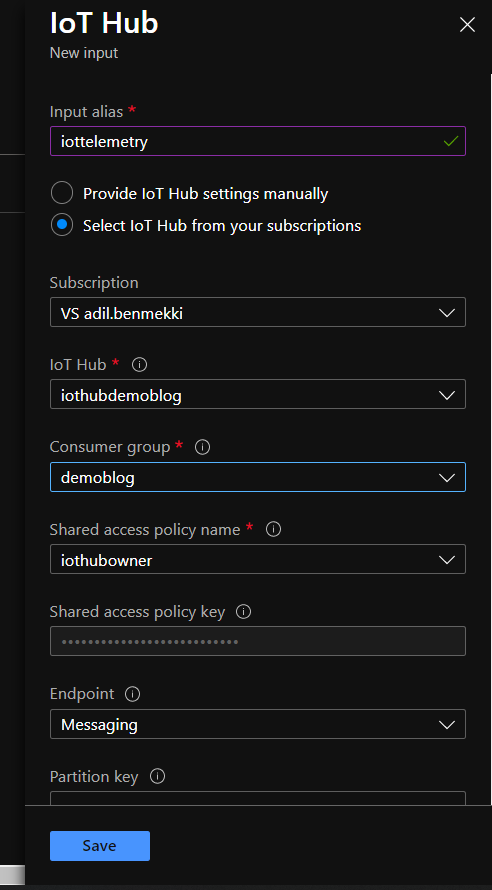
Enter the input alias “Iottelemetry,” choose the “demoblog” consumer group and click “Save.”
Next, go to “Outputs” under “Job topology.”
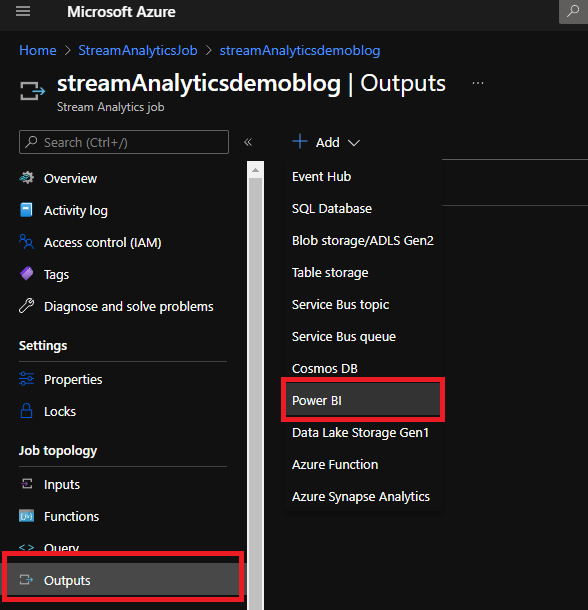
Click “+Add” and select Power BI, as shown in the previous screenshot. Complete the fields as shown below:

Click “Authorize” to authorize the IoT hub to create the table and datasets and distribute the data. Click “Save.”
Click “Query” under “Job topology” and update it as shown in the following screenshot:
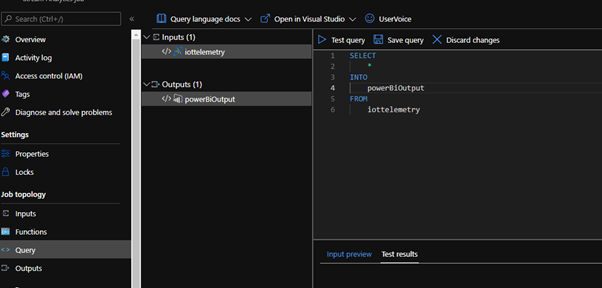
The query we have written is pretty simple. It sends the data from our “input” (“IoT hub” here) to our “output,” Power BI.
Click “Save.” Go to the “Overview” section, click “Start,” select “Now,” and then click “Start.”

After a few seconds, the job will begin sending data from the IoT Hub to Power BI.
Don’t forget to go back to your simulator sending the temperature and humidity data and check that the messages were sent.
Step 7: Create the Dashboard
Now the data has been sent to Power BI via the Azure IoT Hub and Stream Analytics, let’s start building the dashboard.
1. Log in to Power BI and go to the “lottelemetry” workspace we created earlier. Select “Datasets.” You should see something similar to this:

2. Use the first icon in the ACTIONS column to create a new report for all the Iottelemetry
3. While you are on the report page, under VISUALIZATIONS, select the line chart, drag EventEnqueuedUtcTime into the Axis field and define the “temp” and “humd” fields using the values shown in the screenshot below:

An End-To-End IoT Platform Implemented in Azure
We have just finished implementing an end-to-end IoT “type” platform in Azure with:
- An IoT Hub for connecting to the device and collecting telemetry data
- Azure Stream Analytics for real-time event analysis and processing
- Power BI for data visualization
There are several aspects we have not covered in any detail in this post (such as device authentication and provisioning). We will look at these in another post on authentication and device provisioning best practices.
In the meantime, feel free to ask any questions in the comments