Introduction Integrating security into a widely used platform like GitHub is both a challenge and an opportunity to enhance its...
18 October 2022
Lire cet article en Français
Cybersecurity in Azure Sphere: Who, What, When, and How?

Cybersecurity is the featured topic at Cellenza this month. This subject is trending because most companies now realize its importance for all kinds of projects. Today, we’ll discuss Microsoft’s cutting-edge, computer-security-focused processor, Azure Sphere.
What Is Azure Sphere?
Azure Sphere Overview
Azure Sphere is Microsoft’s latest security innovation developed in collaboration with Avnet. According to the official documentation, “Azure Sphere is a secured, high-level application platform with built-in communication and security features for Internet-connected devices. It comprises a secured, connected, crossover microcontroller unit (MCU), a custom high-level Linux-based operating system (OS), and a cloud-based security service that provides continuous, renewable security.” I recommend you also read the full product description.

Source: Microsoft documentation
This platform is a true security gem. It allows us to incorporate all aspects of what is described as a secure device from the outset, in addition to the software components provided by Microsoft (please read our previous post on securing your IoT fleet). With the Azure IoT Edge components as well as any proprietary company security layers, we can safely say that we have a secure device.
This solution consists of three components that work together to protect the devices:
- Azure Sphere-certified microcontrollers: a type of microcontroller unit (MCU) that combines application and real-time processors while incorporating Microsoft’s latest security technology, based on the company’s 20 years of experience with the Xbox in particular.
- Azure Sphere OS: unlike traditional real-time operating systems (RTOSs), this OS embeds multiple security levels by combining Windows security innovations, a security monitor, and a custom Linux kernel for in-depth defense.
- Azure Sphere Security Service: a turnkey cloud service that protects the entire system by providing a reliable communication path between the device and the cloud via automatic updates, threat detection, and online reporting.
It’s also worth noting that all of the components of Azure Sphere OS are open source (including the Yocto metas!).
Go to this Microsoft site and search for “Azure Sphere.”
At the time of posting, the results are filtered in ascending order by version (scroll to the bottom).
Why Does Azure Sphere Exist?
As discussed in our previous post, cyberattacks are becoming increasingly common, sneaky, sophisticated, and bold. We’re just learning how to protect ourselves effectively, and businesses are starting to take security seriously as an aspect of project development. However, most of the equipment used is purchased on the open market, where prices tend to be competitive. In addition, security is sometimes compromised to keep costs down and improve the user experience.
Microsoft has pioneered providing a secure and user-friendly device for system integrators.
Who Is Azure Sphere For?
Current industries
Azure Sphere is for Internet of Things (IoT) project developers and integrators who want IT security to be a key part of their product development.
High Stakes
Knowing the risks involved can make all the difference in a project audit, so let’s talk about cyberattacks.
When this article was published, the top five attacks were:
- WannaCry: the biggest ransomware cyberattack in history. It affected more than 300,000 computers and caused between $4 and $8 billion in damage. It’s the reason Windows no longer asks for permission before updating.
- ExPetr: over $10 billion in damage.
- Stuxnet: destroyed Iran’s uranium enrichment centrifuges.
- DarkHotel: spoofing hotel Wi-Fi networks.
- Mirai: the result of skimping on IoT security. Years-long infection of IoT devices worldwide, all remotely controllable by the attacker. All because manufacturers did not see the point of including antivirus software on their IoT devices.
Read more about these attacks in our previous post on securing your fleet with Microsoft Azure.
We can’t stress this enough: protect your systems! Spending two months honing your security measures is far better than spending two years fixing any damage done.
Key Players
This post is not just for the decision-makers. It is also for all you regular people who have the ability to persuade those around you until the message is heard loud enough to make system security a central aspect of every project. Consider this: if you buy an expensive bike, you will undoubtedly buy an anti-theft device. The same logic applies to IoT cybersecurity. Why would you spend time and money designing a device without ensuring it is secure? The answer is to take the lead in cybersecurity ourselves.
When Is It Beneficial to Integrate Azure Sphere in Your Project?
Typical Project Context
In addition to being a valuable asset in IT security, Azure Sphere is a highly effective tool as embedded intelligence for IoT, despite its compact size. However, it may not be enough for highly complex projects. Imagine your project with the data processing and device of your choice at its core but protected by Azure Sphere: all communications and transfers would pass through it like a “personal bodyguard.” Isn’t this the ideal image for your future projects?
Integration Example with Azure Sphere
I’m on a train as I write this, so let’s use this as an example. Let’s say that each carriage has its own control computer and that they all communicate with one another, except for one at the front of the train whose only job is to manage communication between the carriages and the Cloud (this is a made-up scenario; I don’t know if it really happens). But we know that the data collected by devices all over the world is extremely valuable. It is this data that hackers are trying to steal. To prevent Wi-Fi-based attacks, it makes sense that the computers in each carriage are wired to each other. But what about the device that needs to communicate with the cloud? Where should the security block be placed?
There are two main risks here: software infiltration and data theft. First, a hacker needs physical access to the actual devices if the information is sent via wire. These are usually protected in trains, but for this example, let’s assume otherwise. The devices have to communicate with one another, whether between two computers to share directions or with the central computer to send data to the cloud. We have to keep hackers from accessing this information, however. So, we encrypt it with a secure hardware base. This is where Azure Sphere comes in. It enables us to protect the data while in transit from the carriages and prevent hackers from infiltrating the device.
How to Use Azure Sphere with Azure IoT Edge?
Setting the Scene
Going back to the previous scenario. We need to implement a set of Azure Sphere devices that communicate with the cloud through a central gateway. We will integrate Azure IoT Edge in this gateway for an added layer of security, additional features, remote updates, easy team development, and alert handling close to the source, even when offline. I’m using the Avnet Azure Sphere MT3620 Starter Kit for this session.

Getting Started with Azure Sphere
As an IoT expert, I’m no stranger to working with IoT devices, especially when helping customers. I was surprised by how easy Azure Sphere is to use. Even people with less experience can use it.
With a USB cable connecting the kit to the Windows 11 computer (not tested with other versions), a bridge of several USB serial converters in parallel is automatically created (visible from the file explorer in particular).
You need a few tools to work with this development kit:
- Azure Sphere Software Development Kit (SDK): download and install the SDK from this address (direct download link for Windows), just like a standard Windows installation. Next, check the installation by running the “azsphere” command in a terminal (Windows Command Prompt or PowerShell). If the command doesn’t exist, try reopening the terminal, reconnecting to your Windows session, or making sure the link to the executable is in the system environment variables.
- CMake and Ninja (only if you want to use Visual Studio Code or Windows CLI):
- Link to download CMake: Download | CMake.
- Link to Ninja’s GitHub Releases page: Releases – ninja-build/ninja (github.com).
Download the Windows zip file, unzip it, and put the executable somewhere you’ll remember (e.g., C:\Program Files\Ninja\). - Add the absolute paths for Ninja and Cmake’s bin folder to the system environment variables.
- Sign back into your Windows session or restart your computer to ensure all the changes take effect.
Find the documentation for installing the SDKs here.
Before you can use the device, there’s one more thing you need to do: connect it to Azure! The device should then be connected to the computer (the LEDs on the board should light up).
Now let’s create a user for the device:
azsphere register-user --new-user <email-address>
This command should open a window for connecting to Azure.
If you already have a user, use:
azsphere login
For device protection, you must put the Azure Sphere device in a stand-alone tenant or a tenant specifically for your Azure Sphere devices.
Also, remember that an Azure Sphere device can only be used to create a single Azure tenant and can only be associated with a single Azure Tenant. These are two separate operations. An Azure Sphere device can only be used to create a single tenant, but it can be associated with another later. To create one, run the following command in any terminal:
azsphere tenant create --name <tenant-name or tenant-ID>
A name that is easy to remember is best, so it is only used for your Azure Sphere devices. Use the following command to check that the creation and automatic selection were successful:
azsphere tenant show-selected
If there is no default tenant, use “azsphere tenant list” and “asphere tenant select” to choose one.
Here is a link to the relevant Microsoft documentation for managing your tenants.
Time to permanently link our device to the tenant:
azsphere device claim
I used Visual Studio Code for the rest, but you can also use Visual Studio or CLI: see the full documentation.
Now, let’s set up the network part so our device can communicate freely with the hub. In Visual Studio Code, install the Azure Sphere extension. You can now open Azure Sphere Explorer from the command palette in the left-hand pane of VSCode. Type “View: Show Azure Sphere Explorer” or “Azure Sphere: Open Welcome Page.”

At first glance, it doesn’t look like much, but you can control almost all of the user configuration for the device from this screen.

There is a “+” symbol next to the selected Wi-Fi network. This lets you enter a password, and then the Azure Sphere device will connect to the hub.
Some OS updates may need to be performed manually on devices from an older development kit version. See the relevant Microsoft documentation to check.
The only thing left to do is connect the device to Azure IoT Hub. We could use a connection string for this, but that’s not the most secure option. Instead, we will use an Azure Device Provisioning Service certificate authentication.
Still using the device’s command terminal:
azsphere ca-certificate download --destination CAcertificate.cer
This creates a certificate in the current terminal folder.
Create an IoT Hub and a Device Provisioning Service (DPS) in the Azure portal. Next, go to the “Linked IoT Hubs” section of the DPS to connect the two. Upload the certificate you just created to the “Certificates” section. This ensures that all devices authenticated using the DPS can communicate freely with the IoT hub (see the full documentation).
The device is now ready to use!
Using Azure IoT Edge as a Transparent Gateway
The first step in this section is to set up a device (in this case, a Raspberry Pi 4B+) by installing a 64-bit version of Raspberry Pi OS Lite and Azure IoT Edge.
Installing a 64-Bit Version of Raspberry Pi OS Lite
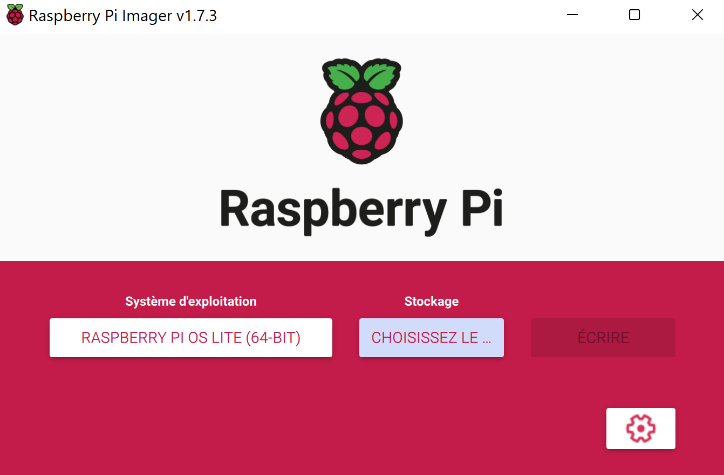
Use the “Raspberry Pi Imager” software, which can be found on the official Raspberry Pi website, with an SD card (preferably at least 16 GB) in your Windows 10/11 computer. This software makes installing an OS on an SD card surprisingly easy. Just choose the operating system (OS) (in this case, Raspberry Pi OS Lite 64-bit) and your SD card.
You’ll need to make one small change: go into the installation settings, check the “Enable SSH” box, create your user ID and enter your Wi-Fi credentials.

Start the installation once this is done. The process should take about two to three minutes, and then you can put the SD card in the device and turn it on.
You can use software like ZenMap if you don’t know how to find your device’s IP address.
Installing Azure IoT Edge
Here, we’ll install the latest version (1.4) of Azure IoT Edge on our device.
Three steps are needed:
- Configure Microsoft sources
- Install the Moby Engine orchestrator
- Install Azure IoT Edge
First, use SSH to connect to your device. To do this, use the following command from a terminal after you have found your device’s IP address:
sudo ssh <username>@<IP>
Enter the password you set up earlier. You are now ready to proceed.
Configuring the Microsoft Sources
In the same terminal:
Installing the Moby Engine Orchestrator
Installing Azure IoT Edge
sudo apt install -y aziot-edge defender-iot-micro-agent-edge
If you get an error message saying that you are trying to remove the “sudo” package, it is because the super-admin user “root” does not have a saved password. Run the command “sudo passwd” to give the administrator user “root” a password.
Check the installation using the command “sudo iotedge version.”
If the software is installed correctly, you can now set up access to the IoT Hub.
Configuring the Device as a Transparent Gateway
Configuring the Certificate Authority and Creating Demonstration Certificates
Let’s start by creating the root certificate authority (CA) certificate, which is the basis for all the others:
Then, the edge CA certificates, which will be used to create certificates to verify the identity of the underlying devices:
Replace <CA cert name> with a name of your choice:
./certGen.sh create_edge_device_ca_certificate "<CA cert name>"
This script will create two files for you: the certificate <path>/certs/<name>.cert.pem, and its key <path>/private/<name>.key.pem
Place the certificate settings in your device’s IoT Edge configuration file:
Sudo nano /etc/aziot/config.toml
(Copy the “/etc/aziot/config.toml.edge.template” file if the “config.toml” file does not exist yet.)”/etc/aziot/config.toml.edge.template”)
Uncomment the “trust bundle cert” parameter and enter an absolute path for the root certificate. For example, later, we will put them in the “/etc/ssl/certs” folder.
Uncomment the three lines in the “[edge ca]” section and give them the following values:
- Cert: the absolute path for the device CA certificate
- Pk: the absolute path for the key
However, it is not yet time to copy the files, so you must prepare and remember the paths.
Connecting to the Azure IoT Hub
Let’s use the Device Provisioning Service to connect the device to the IoT Hub.

We will use a symmetric DPS key to manually register this single device so that the demonstration is easier to follow.
In the “Manage enrollments” section of the Azure portal DPS service, select “Add individual enrollment” and then “Symmetric Key” as the mechanism.
Choose an enrollment ID (the name of the device you want to appear in the IoT hub, which you’ll need to enter in the device’s settings), set “IoT Edge device” to True, and save. This will give you the primary symmetric key to use with the device.

Find the “DPS provisioning with symmetric key” section in the previously used /etc/aziot/config.toml file and uncomment the lines “[provisioning],” “source,” “global endpoint,” “id scope,” “[provisioning.attestation],” “method,” “registration id,” and “symmetric key.”
Enter the values for the Scope ID (this information can be found on the home page of the DPS used), the enrollment ID, and the key.
After saving the file, use the command:
sudo iotedge config apply
If you run “sudo iotedge system logs — -f” to look at the logs, you should see the device connecting to the hub. After 1-2 minutes, you can check by going to the IoT Hub portal.
Edge Hub Deployment and Routing
Only the Edge agent is normally deployed automatically on an Edge IoT device with no deployments. The Edge Hub module is deployed once the modules have been deployed. This module handles message transfers between modules and to the hub, so it is an essential part of our gateway. For that reason, we will deploy it manually.
Head to the portal, specifically the IoT Hub, to do this. You will see your gateway in the IoT Edge section.
Use the “Set Modules” function on this device. Since we only want to deploy Edge Hub, there is no need to add more. Let’s go straight to the Routes section. You will add two routes in this section:
- Name: allMessagesToHub Value: ‘FROM /messages/* INTO $upstream’
- Name: allDownstreamToHub Value: ‘FROM /messages/* WHERE NOT IS_DEFINED ($connectionModuleId) INTO $upstream’
Now you can check the deployment.
Configuring the Gateway Ports
Since the Azure Sphere communicates using the Message Queuing Telemetry Transport (MQTT) protocol, which uses port 8883, we need to open that port on our gateway.
First, we’ll check to see if the port is open on the device:
sudo ufw allow 8883
This command will create a specific security rule for this port.
Configuring the Gateway Domain Name
To find the domain name value (FQDN or Fully Qualified Domain Name) for our device, we need to go to the Azure portal and copy the value of the “DNS Name” parameter on the page for our IoT Edge device.
Use this value in /etc/aziot/config.toml for the “hostname” parameter at the beginning of the file.
Then, use the following command to restart the IoT Edge service:
sudo iotedge system restart
Selecting the IoT Edge Device as the Azure Sphere Parent
So Azure Sphere knows that the IoT Edge device is a gateway, we give it the IoT Edge device ID as the “parent.”
To do this, go to the IoT Hub page of the previously provisioned Azure Sphere and choose the gateway in Device ID > No parent device.
Moving the CA Certificate from the Azure Sphere Device to the IoT Edge Device
The IoT Edge device must have a copy of the Tenant CA certificates to check the authenticity of the Azure Sphere devices.
Use the following commands when the Azure Sphere device is connected to your computer:
azsphere login

azsphere ca-certificate download --destination Cacertificate.cer
There are several ways to convert this certificate to PEM format, but here’s how to do it on a Windows computer:
- Double-click on the file in a browser
- Under “Details,” select “Copy to file”
- In the “Certificate Export” tool, click “Next”
- Select the “Base 64 encoded X.509 (CER)” format, then go to the next page
- Enter the name of the file to export, then click next
- Lastly, close the tool
- Rename the downloaded file .pem
Now, we have to add the information from our certificate to the CA root we created earlier.
On the IoT Edge device:
- Locate the root CA certificate
- Open the CA certificate in PEM format that you created earlier in a text editor and copy/paste the content at the end of the Root CA certificate
- Save the changes and restart the IoT Edge service
Returning the Root CA Certificate via Application Packages
The Azure Sphere device must be able to verify the authenticity of the IoT Edge device in the same way that the IoT Edge device can.
Find the original root certificate you created at the beginning of this tutorial and copy it to the Azure Sphere device for use in your future application projects.
It’s also time to import the IoT Edge configuration file’s Edge CA certificates to the location specified in the configuration file.
More about Azure Sphere
Your two devices are now ready to communicate with the IoT Hub. All you have to do is develop your applications on this secure device!
Azure’s GitHub has some examples.
Would you like to learn more about cybersecurity and cloud security? Read our other posts in this series now:
-
Delegating User and Device Management in Azure AD and Intune
- Smart Business / MLSecOps : How security should drive Machine Learning project?